Fitting Heater Cable
Click any image to enlarge
Since I have owned my 1974 van, the heater lever had been stuck in the off position.
Not very good in the winter. Actually, a real pain in the butt!
The 74` has 3 levers. 1 blue and 2 red. The blue lever controls the cold air intake - on and off.
The left hand red lever controls the distribution of hot air between the foot well and the windscreen.
This cable has snapped and is currently un-available from all the suppliers I have tried.
If anyone has this cable, please get in touch with me. Luckily the cable had snapped at the lever
end so I can still distribute the hot air but now, I have to pull on the end of the cable - not
very satisfactory.
The second lever controls the hot air flow to the front of the van. Up is off, down is on.
The lever connects to 2 cables which operate flaps on the heat exchangers. I particularly
wanted the lever to operate, as the 74` has the optional hot air fan, situated above the
engine. When the lever is pulled down, the lever actuates a switch which controls the fan.
The fan pushes hot air from the engine bay, through the heat exchanger, further heating the air
before it reaches the cab.
I purchased the heater cables from VW heritage for £11 each prior to starting the job. Firstly
to gain access to the cables, the steering wheel is removed (27mm socket). To gain access to the
location nut, use a small flat bladed screwdriver and prise up the black plastic cover, not the
aluminum ring around the cover. The coloured control levers just pull off. Remove the 4 pozi drive
screws that retain the dash consul in place. Be careful as the retaining clips will drop. When the
4 screws are removed, tip the clock assembly forward and disconnect the speedo cable by unscrewing
the knurled retaining nut. The clocks can now be tipped forward (without removing all the wiring)
until they rest on the ignition key shroud.
The cables are retained by 2 clips. The 2 cables loop over each other with a spring clip. Note how
it fits before removing. Follow the cables down 150mm and the cable outer shroud is retained by a
spring steel clip.
Moving under the van, remove the belly pan (10mm spanner). Follow the 2 cables to the heater cable
conduit on the passenger side of the van. At the rear of the van, disconnect the cables from the
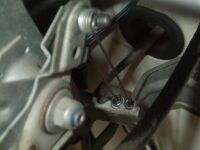
heat exchanger flaps (8mm spanner) and pull the cable clear of the flaps. The nuts on my van had
corroded in place and required soaking in penetrating fluid before they would move without
the risk of damaging the flap. Return to the front of the van and pull the cables through the
conduit. If the cables are seized in the conduit, expect trouble. Try raising the front of the van
as high as possible and use plenty of penetrating oil for a few days. If this does not work, the
only option is to renew the conduit which is a pain of a job. Luckily for me, with a bit of tugging
the cables came through. Note which cable came from which cable as the 2 sides are different lengths.
With the cables out, check the length against the new cables. I did not do this - see end!!!
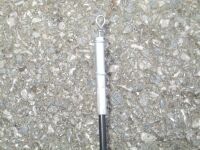
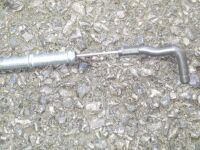
The passenger side cable has a metal rod bent at 90° on its end and the drivers side cable
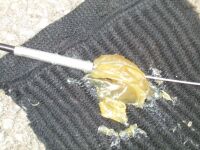
has a loop made from the cable itself. Prior to fitting the cables, I greased the inner cable
on the drivers side as this could be removed (the passenger side cannot) and I also greased
the outer shroud to prevent them from seizing in the conduit in the future. From under the van,
each cable was pushed through the conduit until it reached the heat exchanger. The opposite end
was then passed into the cabin through the grommet in the floor and reconnected to the heater control
levers. The clock assembly was re-fitted. Note the retaining clips are real buggers to hold in
position while the screws are tightened.You have to be a real contortionist to reach from under
the dash and hold the clips. The clips are only help in place when under tension from the screws.
Reconnect the speedo cable by placing the end of the cable in the aperture in the back of the speedometer
and tighten the knurled nut by hand. This is done from under the dash and sounds difficult but
it does all go into place easily. Replace the steering wheel not forgetting to refit the horn
connection.
Move the heater lever to the down position and return to the rear of the van. Connect the cables
to the heat exchanger mechanism making sure that you replace any grommets from the end of the
conduit. Move the flaps to the maximum open position against the spring pressure and thread
the cables through the retaining nut. Complete for both sides. Check that when the heater lever
is moved up, that the heat exchanger flaps close. Very important as this took some real fiddling
by me. The cable on the passenger side only just reached the heat exchangers, while the other
side was too long and fouled on a crimp on the cable. This meant that, the drivers side could
not be completely shut and the passengers side, fully opened. The control lever in the cab could
only be pulled down to within 25mm of the bottom. Luckily, this was enough to operate the hot
air fan. This is why, I stated earlier to check the length of the old cables against the new.
Hopefully I will be able to locate a set of new old stock cables and some time replace the incorrect /faulty
ones I was supplied.
Return to the front of the van and replace the belly pan.
Even though the cables do not operate
as good as I would wish, they are 10 times better than I had. I now have plenty of hot air after the engine
has fully warmed up after about 5 miles. Job complete
Home


